Map your Custom Domain to Your App Service App

Azure App Service provides a unique default FQDN for every App Service App like myapp.azurewebsites.net. However, we can also map our own domain to App Service App. Custom domain mapping feature is only supported by paid plans, while custom TLS/SSL binding is only supported by Plans higher than Basic. For more information about App Service Plan, see App Service Pricing.
Purchase a Domain#
The very first step is to purchase your domain. You can buy your domain at App Service or any other domain registrar like Namecheap, GoDaddy, Domain and etc.
Verify Your Domain Ownership and Add DNS Record#
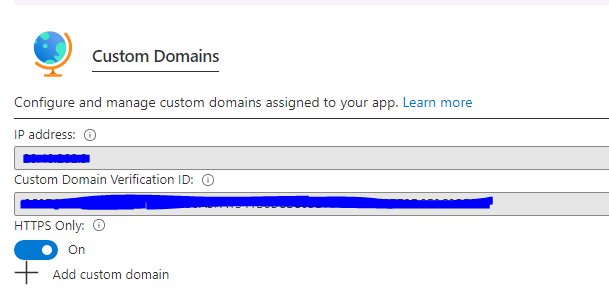
You need to verify the ownership by adding the App Service Custom Domain Verification ID as a TXT record at your domain registrar. You can find this ID at Azure Portal >> Custom Domain. If you are going to map a root domain to your App Service App, configure the host/name as asuid, other wise asuid.subdomain.

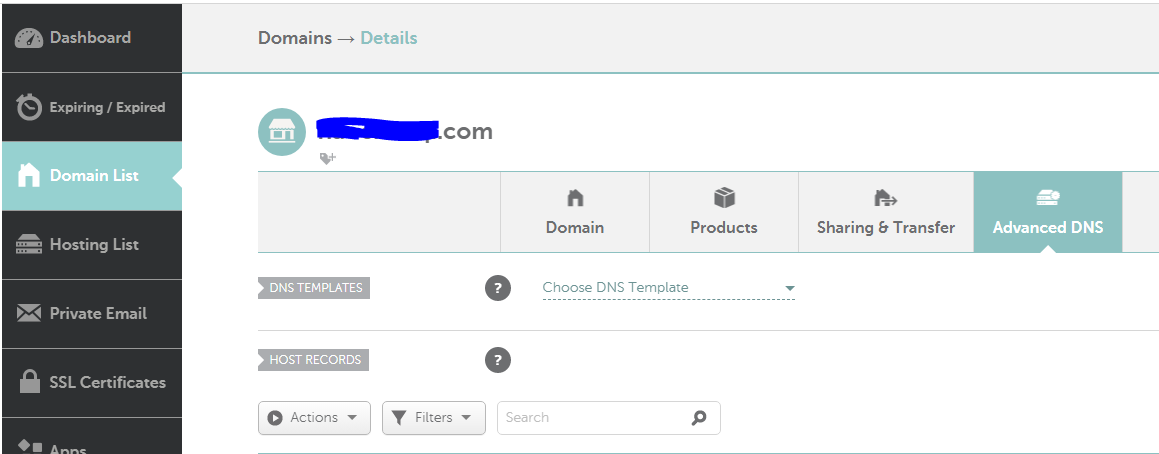
To add this DNS record, you need to go to the dashboard of your domain provider and find DNS record management section. The name for this section can vary for different providers. For example, you can find this at Advanced DNS in Namecheap dashboard Domain List >> Advanced DNS.
Adding domain verification IDs to your custom domain can prevent dangling DNS entries and help to avoid subdomain takeovers. For custom domains you previously configured without this verification ID, you should protect them from the same risk by adding the verification ID to your DNS record. For more information on this common high-severity threat, see Subdomain takeover.
The next step is to create DNS records. You can choose A record to map the root domain to your App Service or CNAME to map a subdomain.
Add Your Custom Domain to Azure App Service#
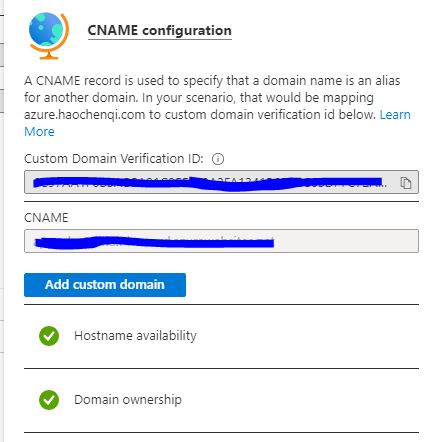
Go back to Azure Portal >> Custom Domains and click "Add Custom domain" to validate. If your domain is available and you have added the TXT record, you will see a screen like below:
Click "Add Custom domain" to add the verified domain.
Create a TLS Binding to Use HTTPS#
Now you can visit your site with the domain you just added. However, you can only use HTTP because no certificate is added to this custom domain.
Luckily, Azure App Service provides free certificates for Azure apps known as Azure App Service Managed certificates which allow us to add the TLS binding with few clicks.
To use Azure App Service Managed Certificate, go to Azure Portal >> TLS/SSL settings. Click Private Key Certificate then choose Create App Service Managed Certificate to generate a free certificate for your custom domain.
After your certificate is generated, go back to Custom domains page and add the certificate as a binding. 
Summary#
In a summary, we can add our custom domains to Azure App Service apps and create TLS bindings with free App Service managed certificates to enable HTTPS.